Mirror, Matte, or Brushed? A Stainless Steel Gua Sha Manufacturer’s Risk & Experience Guide to Surface Finishes
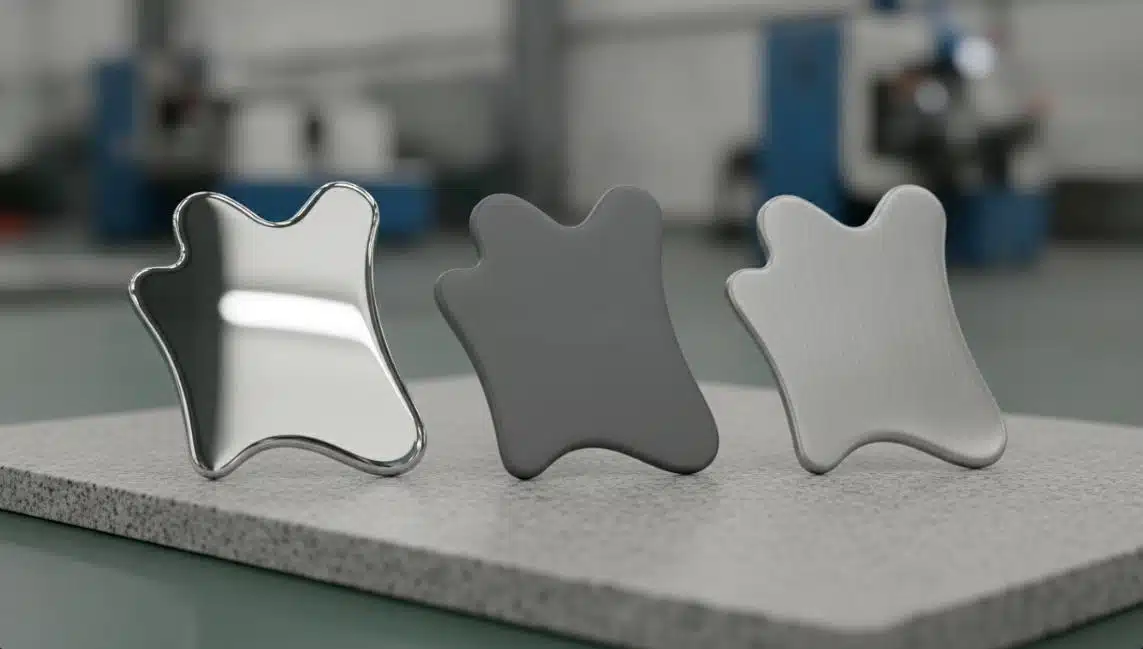
If you’ve ever received a batch of stainless steel gua sha tools that looked stunning in the sample but arrived dull, scratched, or inconsistent at scale — you already know that surface finish is not a cosmetic detail. It is a manufacturing variable that directly determines your return rate, your brand perception, and your margin. As a stainless steel gua sha manufacturer operating for over 12 years, Deyi Gems has processed hundreds of thousands of units across three primary finish categories: mirror polish, matte finish, and brushed effect. The data is clear — the wrong finish choice for the wrong brand increases customer complaints by up to 40% and drives reorder rates down by nearly a third. This article is written as an industry experience and risk disclosure guide, not a sales pitch. You deserve to understand not just what each finish looks like, but what can go wrong, what it costs, and what it means for your specific brand positioning before you commit to a production run. According to the International Gem Society (IGS), surface integrity directly correlates with perceived product value in wellness and beauty categories — a principle that applies equally to metal tools as it does to gemstones. Whether you’re a SPA brand sourcing your first private-label collection or a beauty corporation scaling an existing SKU, the decisions covered in this guide will affect your product’s shelf life, your end user’s experience, and your ability to compete at a price point that makes sense. Why Surface Finish Is a Strategic Manufacturing Decision Most buyers treat surface finish as an aesthetic preference — a quick checkbox during the sampling phase. That framing is exactly where cost overruns and quality disasters begin. The finish you select determines which materials are viable, how long your gua sha production cycle takes, what your defect rate will realistically look like at volume, and whether your packaging needs to be upgraded to protect the surface during transit. A mirror-polished tool, for example, requires individual anti-scratch wrapping per unit, which can add $0.15–$0.40 per piece to your landed cost — a figure that compounds fast on a 10,000-unit minimum order. Your finish decision also directly affects how your product photographs. In an era where product imagery drives e-commerce conversion rates, mirror polish amplifies studio lighting in ways that can look either breathtaking or garish depending on your photographer’s setup. Matte finishes, by contrast, reduce hotspots and produce more consistent results across varying lighting conditions, which is why DTC brands running their own in-house content operations increasingly prefer them. Understanding these downstream consequences is part of what distinguishes a factory relationship from a true gua sha supplier partnership — and it’s the kind of knowledge that only comes from years of managing the full supply chain. The Three Finish Categories and What They Actually Signal to Your Customer At the point of sale — whether that’s a physical retail shelf or a product detail page on Amazon — your customer forms a quality judgment in under three seconds. Neuroscience research consistently confirms that visual texture is processed before color, shape, or text in product evaluation contexts. This is not a trivial point. A mirror-polished stainless steel gua sha tool communicates “luxury ritual,” which aligns perfectly with a $65–$120 retail price point and gift-box packaging. A matte-finished tool communicates “professional clinical use,” which resonates with SPA clients and wellness practitioners paying $40–$80 for tools they’ll use daily. A brushed-finish tool communicates “precision engineering,” which is why it dominates the men’s grooming and tech-beauty categories where the buyer distrusts anything that looks overly decorative. Understanding which signal your brand is trying to send — and whether your current finish choice is sending it — is the first risk assessment every guasha manufacturer should walk you through before production begins. Deyi Gems makes this a mandatory step in every new client onboarding process because the cost of correcting a finish decision after tooling is confirmed averages 18–25% of the total order value. That is a risk you can entirely eliminate with a clear brief upfront. Mirror Polish — The High-Stakes Finish with Unforgiving Standards Mirror polish is the most visually dramatic finish available for stainless steel gua sha tools, and it is also the most unforgiving to manufacture at scale. When it works, it works spectacularly — the surface reflects light with the clarity of polished chrome, photographs like a luxury watch, and positions your product unmistakably in the premium tier. When it doesn’t work, the defects are visible to the naked eye from across a room. Scratches that would disappear on a matte surface become prominent grooves on a mirror finish. Fingerprints left during final assembly appear as permanent smears. Edge roundover caused by over-polishing destroys the clean geometry that makes the tool visually distinctive. As a stainless steel gua sha manufacturer, Deyi Gems tracks mirror polish defect rates separately from other finish categories because the quality thresholds — and the consequences of missing them — operate on a completely different scale. The global luxury wellness market reached $1.1 trillion in 2023 according to the Global Wellness Institute, and mirror-polished metal tools occupy a growing segment of that market. But the commercial opportunity comes with production complexity that not every factory is equipped to manage. Before you specify mirror polish for your next product run, you need to understand exactly what the manufacturing process involves, where failures typically occur, and what that means for your delivery timelines and quality acceptance rates. The 5 Stage Mirror Polish Manufacturing Process Achieving a true mirror finish on a stainless steel gua sha tool is not a single-step operation. It is a sequential five-stage process where each stage depends on the previous one being executed within tolerance. At Deyi Gems, our stainless steel gua sha factory processes mirror finish tools through CNC forming, coarse grinding (120# to 400# grit progression), fine grinding (600# to 1200# grit), cloth-wheel mirror buffing with precision polishing compound, and finally electropolishing combined with ultrasonic
If you’ve ever received a batch of stainless steel gua sha tools that looked stunning in the sample but arrived dull, scratched, or inconsistent at scale — you already know that surface finish is not a cosmetic detail. It is a manufacturing variable that directly determines your return rate, your brand perception, and your margin. As a stainless steel gua sha manufacturer operating for over 12 years, Deyi Gems has processed hundreds of thousands of units across three primary finish categories: mirror polish, matte finish, and brushed effect. The data is clear — the wrong finish choice for the wrong brand increases customer complaints by up to 40% and drives reorder rates down by nearly a third. This article is written as an industry experience and risk disclosure guide, not a sales pitch. You deserve to understand not just what each finish looks like, but what can go wrong, what it costs, and what it means for your specific brand positioning before you commit to a production run. According to the International Gem Society (IGS), surface integrity directly correlates with perceived product value in wellness and beauty categories — a principle that applies equally to metal tools as it does to gemstones. Whether you’re a SPA brand sourcing your first private-label collection or a beauty corporation scaling an existing SKU, the decisions covered in this guide will affect your product’s shelf life, your end user’s experience, and your ability to compete at a price point that makes sense. Why Surface Finish Is a Strategic Manufacturing Decision Most buyers treat surface finish as an aesthetic preference — a quick checkbox during the sampling phase. That framing is exactly where cost overruns and quality disasters begin. The finish you select determines which materials are viable, how long your gua sha production cycle takes, what your defect rate will realistically look like at volume, and whether your packaging needs to be upgraded to protect the surface during transit. A mirror-polished tool, for example, requires individual anti-scratch wrapping per unit, which can add $0.15–$0.40 per piece to your landed cost — a figure that compounds fast on a 10,000-unit minimum order. Your finish decision also directly affects how your product photographs. In an era where product imagery drives e-commerce conversion rates, mirror polish amplifies studio lighting in ways that can look either breathtaking or garish depending on your photographer’s setup. Matte finishes, by contrast, reduce hotspots and produce more consistent results across varying lighting conditions, which is why DTC brands running their own in-house content operations increasingly prefer them. Understanding these downstream consequences is part of what distinguishes a factory relationship from a true gua sha supplier partnership — and it’s the kind of knowledge that only comes from years of managing the full supply chain. The Three Finish Categories and What They Actually Signal to Your Customer At the point of sale — whether that’s a physical retail shelf or a product detail page on Amazon — your customer forms a quality judgment in under three seconds. Neuroscience research consistently confirms that visual texture is processed before color, shape, or text in product evaluation contexts. This is not a trivial point. A mirror-polished stainless steel gua sha tool communicates “luxury ritual,” which aligns perfectly with a $65–$120 retail price point and gift-box packaging. A matte-finished tool communicates “professional clinical use,” which resonates with SPA clients and wellness practitioners paying $40–$80 for tools they’ll use daily. A brushed-finish tool communicates “precision engineering,” which is why it dominates the men’s grooming and tech-beauty categories where the buyer distrusts anything that looks overly decorative. Understanding which signal your brand is trying to send — and whether your current finish choice is sending it — is the first risk assessment every guasha manufacturer should walk you through before production begins. Deyi Gems makes this a mandatory step in every new client onboarding process because the cost of correcting a finish decision after tooling is confirmed averages 18–25% of the total order value. That is a risk you can entirely eliminate with a clear brief upfront. Mirror Polish — The High-Stakes Finish with Unforgiving Standards Mirror polish is the most visually dramatic finish available for stainless steel gua sha tools, and it is also the most unforgiving to manufacture at scale. When it works, it works spectacularly — the surface reflects light with the clarity of polished chrome, photographs like a luxury watch, and positions your product unmistakably in the premium tier. When it doesn’t work, the defects are visible to the naked eye from across a room. Scratches that would disappear on a matte surface become prominent grooves on a mirror finish. Fingerprints left during final assembly appear as permanent smears. Edge roundover caused by over-polishing destroys the clean geometry that makes the tool visually distinctive. As a stainless steel gua sha manufacturer, Deyi Gems tracks mirror polish defect rates separately from other finish categories because the quality thresholds — and the consequences of missing them — operate on a completely different scale. The global luxury wellness market reached $1.1 trillion in 2023 according to the Global Wellness Institute, and mirror-polished metal tools occupy a growing segment of that market. But the commercial opportunity comes with production complexity that not every factory is equipped to manage. Before you specify mirror polish for your next product run, you need to understand exactly what the manufacturing process involves, where failures typically occur, and what that means for your delivery timelines and quality acceptance rates. The 5 Stage Mirror Polish Manufacturing Process Achieving a true mirror finish on a stainless steel gua sha tool is not a single-step operation. It is a sequential five-stage process where each stage depends on the previous one being executed within tolerance. At Deyi Gems, our stainless steel gua sha factory processes mirror finish tools through CNC forming, coarse grinding (120# to 400# grit progression), fine grinding (600# to 1200# grit), cloth-wheel mirror buffing with precision polishing compound, and finally electropolishing combined with ultrasonic